I love you because...


Isn't this such a sweet idea??  I think I originally came across it a year ago here, and I just finally got around to putting it together.  It took about 5 minutes.  I did have to buy the frames first, but I ended up already having one, so that was helpful.  After I designed them in PSE I just printed them on cardstock and put them in the frames.  I use a dry erase marker and write the love notes directly on the glass.  It's so fun to read them to the girls each time we go in their rooms.  Lila likes to point to the frame and say "I love you cause!" whenever we walk by.  When I first read the whole thing to her she repeated "I a good helper!" in such a proud little voice.  So sweet.  I've been changing it after I know they've heard it a few times.  Luckily there's a hall closet right between their rooms, so I keep the pen and eraser stored in there for easy access.


Our hallway is really dark, so they were hard to photograph, but this is what they look like outside the girls' rooms.  I think they're a really meaningful way to fill up the blank space!  I've included the art below in case anyone wants to print their own.  I think you can just save it to your computer!

 
Jenny
Linking up to... Happy Go Lucky Weekend Bloggy Reading

Big Photo Strips

I can't believe how long it's been since I've posted anything! There's been no lack of creating over here, just a lack of a functional computer!  I guess my four year old laptop decided to revolt against the 15,000 photos I shoved into every nook and cranny of its memory.  Sorry little guy.  It's okay though because now we have a shiny new computer!
 
So in preparation for Thanksgiving and Christmas, both of which we hosted, I decided to complete a few projects that would help fill up our blank walls!  This is one of my favorite projects I've ever seen done (I originally saw it here), and now that I've done it I'm trying to refrain from putting them all over my house!!  EASIEST PROJECT EVER!


Supplies:
- 2x4 thin plywood (cut in half by the nice people at Home Depot)
- Black paint (I used acrylic craft paint)
- Cute photos of kids printed 12x12 (I had mine printed at Costco)
- Double-sided tape
- Sawtooth hanger and glue
 
The first thing I did was to have a little photo session with my girls.  I hung up a white tablecloth on the wall (I just taped it up) and had them make cute faces while I snapped dozens of pictures.  I picked out the four pictures I liked the best of each girl and had them printed 12x12 at Costco.  I think each one was $2.99. I chose this route because they were automatically the right size and I was kind of in a hurry!  I bought my plywood board at Home Depot, had them cut it, and painted all of the edges black.  To hang them, I used E6000 to glue a sawtooth hanger onto the back of each one.  I decided to attach the photos with double sided tape because these are hung in a high kid traffic area and if one of the photos gets ruined it will be easy to peel it off and replace it!  The hardest part was probably hanging them evenly.  These photo strips are hung on the wall of the landing that leads to our basement, so the lighting is terrible (hence the dining room shot above)!  Those walls are actually kind of gray if you can believe it. :)


I'm wondering how many of these I can get away with having around the house without it looking too weird... :)
 
***UPDATE:  These have been up for 6 months and the double sided tape is still holding strong!  I love that it stays up so well but that I can still easily remove a picture and replace it if I need to, or remove them all for a complete update and not have to get new plywood!  I used Scotch brand if that helps, and I'm not being paid to say this. ;)*** 
 
Jenny
Linking up to... Weekend Bloggy Reading

Bloom Designs Today's Creative Blog Tip Junkie

Silhouettes for Mother's Day

I can't believe it's almost Mother's Day!  That also means that it's almost my birthday, and after that, my anniversary!  My poor husband is in the unfortunate position of having to celebrate me ALL month long! ;)  I guess technically the anniversary is for both of us, but you know what I mean.  He's excellent at buying gifts, but when it comes to the handmade sort, I'm on my own. :)  Last year I did a couple of projects for myself that I've really enjoyed having in my home.  I've always loved silhouettes, so when I came across this tutorial for silhouettes from Amy of Positively Splendid, I was excited to try it!


Her instructions are very straight forward, especially if you're familiar with PSE.  My final products are displayed in Ikea frames.  I had them printed at Costco as 8x8 inch photos for $1.49 each.  I could've easily printed them at home, but I think our printer was out of commission. :)  I ended up just mounting the photos on top of the matte that came with the frame because the matte would have covered some of their faces.


Once I got the hang of using PSE, the hardest part of this project was getting decent profile shots of a 10 month old and a 2 year old. :)  Since these are almost a year old, I'll probably update them soon, but for now I love seeing these little baby faces every day. :)


Jenny


Linking up to...
One Artsy Mama Photobucket Weekend Bloggy Reading

Big Clipboard to Chalkboard

Here's a little before and after of the big clipboard on my mantel.  It started as a well loved artist's clipboard from Goodwill.  There were actually two of them when I bought it and now I'm mad that I didn't buy them both!  At the time I had no idea what I was going to do with the first one though, so it seemed silly to have two.  It was in the garage for awhile being used as a dust pan, so you can see that it's come a long way.


The makeover consisted of a good scrubbing and a few coats of chalkboard paint. Pretty simple! I love that I can use it for chalk art, or to display photos, kid art or other fun decor.  

Jenny


Linking up to...
Photobucket The Shabby Nest

Not a Spring Mantel

I've always been so envious of other people's nicely decorated mantels.  Up until now we've always had a tv on top of our mantel, therefore no space to decorate!  I was actually still bummed when we moved and once again put our tv on the mantel, until I realized there are two mantels in this house!  I finally got around to decorating the one in the basement, although it's not necessarily springy.  I'm just excited to have it look fairly nice and put together, so we'll see if I get around to changing it up!


Here's the info on each element (I've been looking for an excuse to do this!):


1. Birch tree painting by me.  It's been hanging out in the garage waiting for a home.  2. Old clipboard from Goodwill painted with chalkboard paint and decorated.  I love that I can change it anytime! 3. Wood pedestal from Southern Living at Home.  4. Jute Sphere borrowed from my upstairs display (I need to make a few more!). 5. Skeleton key made using techniques from my Button Initials and my Aluminum Foil Letters. 6. Clock from wuslu.com.  7. Sticks in a metal bucket/vase also from wuslu.com.  It was originally black, but I painted it with some Old White ASCP.

I think that now that I've actually decorated a mantel, I might be able to change it up once in awhile.  I do love the look of seasonal decor!


Jenny


Linking up to...
Tip Junkie handmade projects Craft & Tell Oopsey DaisyThe 36th AVENUEOne Artsy Mama five days five ways  feature friday free for all

Our Bubba

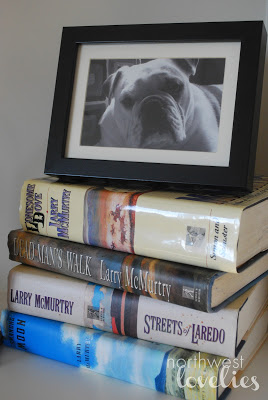
According to the American Kennel Club, the Bulldog is equable and resolute, dignified and courageous. And then there's our Bubba; Gus really, or actually Augustus, named for the character Augustus McCrae in Larry McMurtry's Lonesome Dove.  If you haven't read this book, I highly recommend it.  It's amazing. I won't write a review, but check out this site if you want to know more.


It's not that Gus isn't those things, it's just that I wouldn't necessarily choose those particular adjectives to describe him. :)  Although, of those, courage really isn't his strong suit.  Gus is afraid of many, many things, including vacuum cleaners, garbage cans, shopping bags, or anything you might be holding that's unfamiliar.  He is, however, stubborn and predictable, lovable and sweet.

Gus came into our lives right before we were married, and was our first baby.  He went to puppy kindergarten, doggy daycare, was my walking partner, and had birthday parties!  His role in our family has changed a lot since we've had actual children, but as he's grown up, he's adapted well. 


Bulldogs are listed in the bottom ten of the smartest dog breeds, which means that in a study they needed to hear commands 80-100 times before they obeyed them 25% of the time.  I wouldn't necessarily call him dumb though.  He has us pretty well trained to do whatever he wants! 


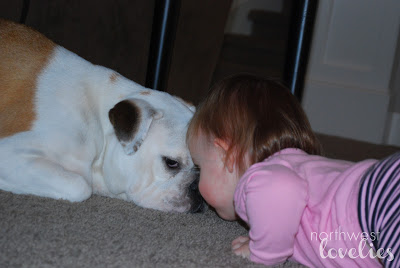
While Gus drives me crazy by barking at the most inopportune times (naptime!), shedding all over the house, eating anything smallish that lands on the floor (binkies, puzzle pieces, sippy cups, wallets), and jumping on our guests, he's also sweet, cuddly, and attentive.  He sits on our laps as soon as there's an opportunity and adores being scratched, pet or brushed.  He responds to tears with a compassionate head tilt and a consoling nuzzle.  He's a favorite at the vet; each time we visit the doctors and techs can't get enough of him.  He's definitely a quirky guy, but he's our Bubba.


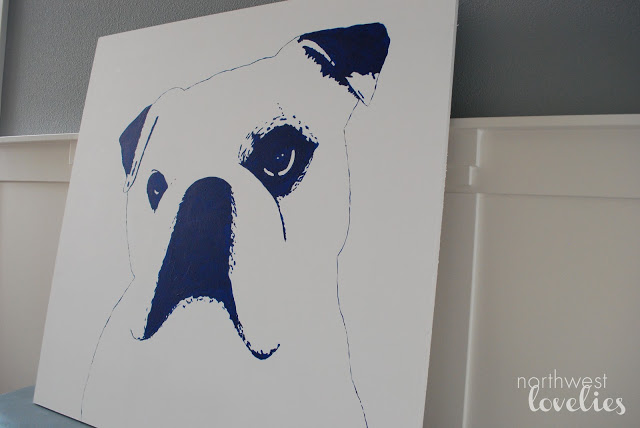
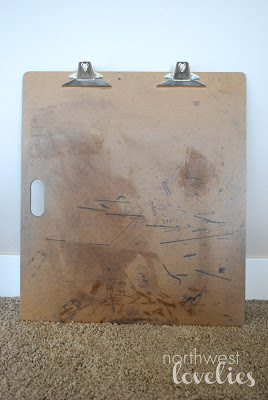
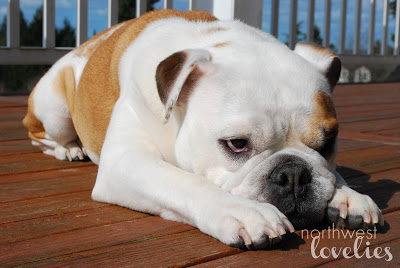
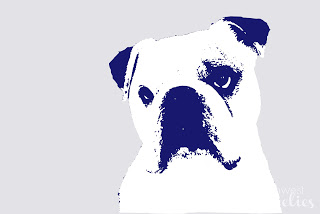
I wanted some large scale art for our office and thought Gus would be the perfect subject!  I've been looking forward to finally using some navy blue in my decorating, and the slate grey/blue office is the perfect space for it (this photo is in the dining room- the office has no space for photos right now!).  This piece is painted onto a 3ft. x 3ft. piece of 3/4in. mdf.  I started with some white interior flat paint as a base and used a navy blue craft paint for the design.  To sketch Gus, I started with this photo:


This is Gus' expression when you're holding food in one hand while you take a picture with the other. Actually, this is his expression anytime there's food involved. :)

Using Photoshop Elements, I traced around Gus using the magnetic lasso tool and then filled the background in with a light color.  I used the stamp effect to create a stencil look.  


I drew small grid marks on the mdf board at 4 inch increments and turned on the grid in Elements.  Each 1 inch square on my picture in Elements was a 4 inch square on my board, if that makes sense.  I was able to use the grid to draw the picture of Gus.  It made it so much easier to draw such a large scale picture.  Once the main outlines were down in pencil, I painted over them with the blue paint and erased the pencil marks. 


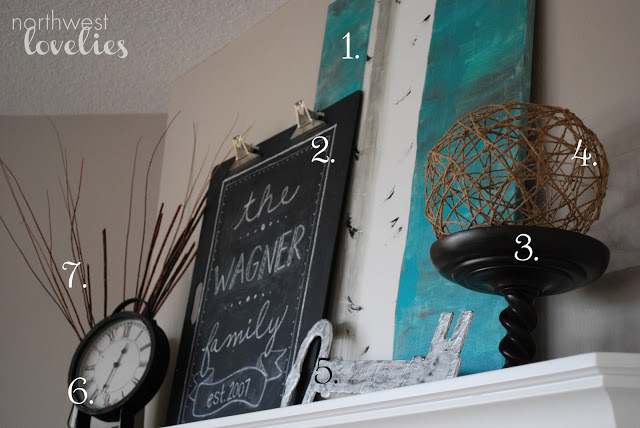
 I can't wait to put this in the office!  It will be nice to start getting that room put together!


Jenny


Linking up to...

Teagan's Travels
DIY projects and crafts Tip Junkie handmade projects    Craft & Tell The 36th AVENUE