This big girl room makeover is taking FOREVER. We have the furniture, finally, but no bedding. Being a typical three year old, she is very particular about the blanket she sleeps with and wants nothing to do with "cold" (cotton) duvet covers. I'll probably end up getting one of PB Kids chamois duvets, but it seems like a lot of money if she's completely content with a fuzzy blanket! In the meantime, I've been trying to focus more on the walls. So far she has the two scrapbook paper dress canvases and her PB Kids inspired Princess Dress Boutique sign, but her room has a ton of blank wall space, so it still looks bare!
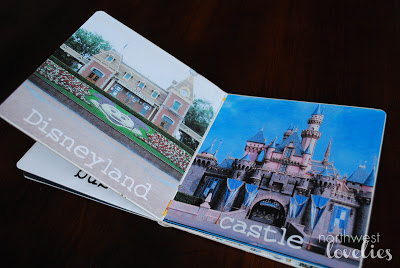
Keeping with the princess theme, (I'm slowly losing the battle of keeping it subtle and more unique by focusing on dresses...) we decided to add a castle to the decor. After a really fun trip to Disneyland where we stayed at the Disneyland Hotel, we fell in love with the castle headboards that light up! Here's a link if you haven't seen them. I've had a canvas lying around that I originally painted for Lila's nursery, but never finished. Before I had a chance to do anything with it, we moved and the girls switched color schemes, so it was up for grabs for Camille's room. Here's what I came up with:
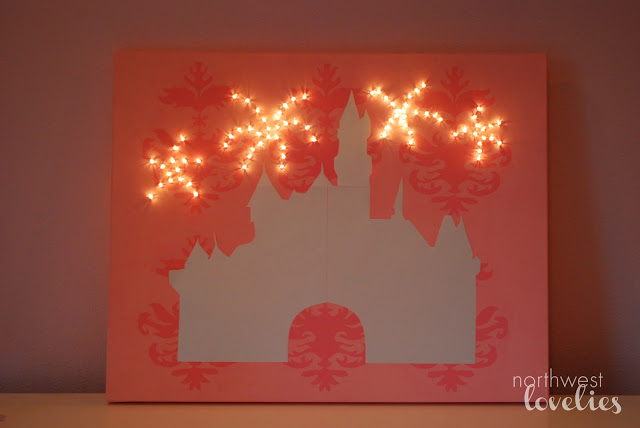
The castle is a replica of Sleeping Beauty Castle in Disneyland. I pulled up a picture of its silhouette online and drew it out onto pearlescent scrapbook paper. Because the paper was only 12x12 and the castle is pretty big, I had to piece it together. You could also paint it on, or even get one cut from vinyl if you wanted to avoid seams. I just really wanted to use pearly paper. ;) The castle is glued on with rubber cement. Oh, and the damask background is what I had previously painted. I actually drew it onto contact paper and created a stencil. I originally had big plans for this canvas, but I think it turned out pretty neat this way.
The fireworks are white Christmas lights. I started with a strand of 50, but ran out about halfway through, (I didn't realize how many lights I'd be using for each firework!) so I added another 100. Another 100 was overkill, by the way. If I were to do this again I would do the math beforehand and just start with 100 total! Anyway, to create the fireworks, I drew firework shapes on the back of the canvas and kind of just jumped in. I poked tiny starter holes in the back with an exacto knife and then poked my lights through. The lights kept threatening to jump back out, so I secured them with hot glue. This part took a LONG time. I don't know if it was just the hot glue I was using or what, but I had to hold each light for almost a minute before I could move on to the next one! I had the genuis idea (of course when I was almost completely done) of just poking the holes in the canvas and then stringing the lights across the back rather than poking them through. It would probably work just as well... ah, well, maybe next time. :)
Here is how I dealt with the back. You definitely need to use a deep canvas for this project to wrangle the cords. There's probably a much better way to do this...
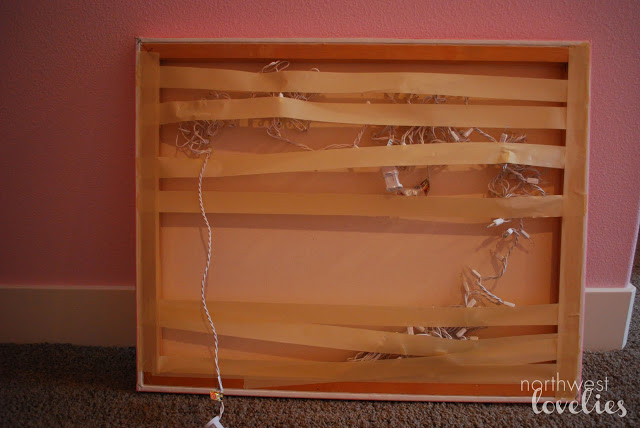
See all those lights on the bottom? Those are all the unused lights. My husband figured out which bulb to pull out so that those aren't lit up when the top ones are on.
Here's the back up close:

And the front up close:

And the final product once again:


The fireworks are white Christmas lights. I started with a strand of 50, but ran out about halfway through, (I didn't realize how many lights I'd be using for each firework!) so I added another 100. Another 100 was overkill, by the way. If I were to do this again I would do the math beforehand and just start with 100 total! Anyway, to create the fireworks, I drew firework shapes on the back of the canvas and kind of just jumped in. I poked tiny starter holes in the back with an exacto knife and then poked my lights through. The lights kept threatening to jump back out, so I secured them with hot glue. This part took a LONG time. I don't know if it was just the hot glue I was using or what, but I had to hold each light for almost a minute before I could move on to the next one! I had the genuis idea (of course when I was almost completely done) of just poking the holes in the canvas and then stringing the lights across the back rather than poking them through. It would probably work just as well... ah, well, maybe next time. :)
Here is how I dealt with the back. You definitely need to use a deep canvas for this project to wrangle the cords. There's probably a much better way to do this...
See all those lights on the bottom? Those are all the unused lights. My husband figured out which bulb to pull out so that those aren't lit up when the top ones are on.
Here's the back up close:
And the front up close:
And the final product once again:
I'm pretty happy with how it turned out! It definitely looks neat at night. Best of all though was Camille's huge smile when she saw the fireworks light up. :)